Wednesday, March 19, 2014

A Digital Place for Everything, and Everything in its Digital Place

How a global video production company keeps track of its ever-growing digital library
Jason Hester: Ace Video Hoarder

Confession:  I’m a digital hoarder.  I have terabytes of data in my personal library.  Music, movies, pictures, sound effects, apps, you name it and I’ve probably got it sitting on a hard drive.  In most cases, being a hoarder is frowned upon, but in my world as a video editor I wear it as a badge of honor. 

As any video editor will tell you, clients love to revise old videos. 

Typical Client Request: 

“You remember that company overview video we did four years ago?  We just got a new CEO, so we need to replace all of the former CEO’s sound bites.  Can you guys shoot that and have an updated video ready to go by tomorrow’s close of business?”

In the “old” days (10-15 years ago) that would mean finding your Avid or Final Cut Pro project file and all of the tapes used in the original project and setting up a large batch capture to rebuild the video clip-by-clip in real-time using a tape machine.  Since then, a lot of cameras have gone tapeless, meaning they record to an internal hard drive or removable-media, such as P2 or SD cards.  That’s great for ingesting footage.  No more digitizing tapes in real-time. Instead, you just copy data right from your camera’s removable-media onto your computer and start editing, often much faster than the real-time digitizing of tapes. 

Re-connecting your media to make changes to an old project is much easier, too.  For the most part, you can just highlight your sequence or timeline, point it to a folder of footage and it will rebuild it for you almost instantaneously. 

One downside to this is you no longer have a collection of tapes holding all of your raw footage to store in a library after the project has been completed.  The footage only exists as data on a hard drive, and hard drives fill up fast.  Here at Firstline, we have a 16 terabyte drive array dedicated to video (that’s 16,000 gigabytes) and it still fills up way faster than I would have ever imagined.  Keeping it backed up and properly archived is a must.

Carbon Copy Cloner:


First, let’s talk a little bit about maintaining a backup.  Attached to our 16TB array, we have an additional 12TB array attached via Firewire 800.  We use an excellent app called Carbon Copy Cloner (http://www.bombich.com/) to create an exact clone of our video drive that updates every night.

 Here’s the way Carbon Copy Cloner works for us: we’ve created a scheduled task that runs every night at 10 pm.  The very first backup took almost 48 hours to copy all of our data over to the new backup drive.  After that, backups have been much faster because Carbon Copy Cloner compares the two drives every night and only backs up files that have changed or been added since the last scheduled backup.  So, we always have a cloned backup of our video drive in the case of a catastrophic failure on our main array.

Archives: 

You may be wondering why we’ve only got a 12TB drive to back up a 16TB drive. The answer to that is simple: just because you’ve got 16TB’s available, you should never completely fill it up.  Drives run better when they’ve got space available and by having our backup drive only be 12TB’s, this helps us to police ourselves a bit and make sure we’re properly archiving our data after projects are complete.


When it comes to archiving, we use a hard drive docking station that connects to our individual computers via USB-2 or E-SATA.  These docks allow us to buy raw, internal hard drives, which are considerably cheaper than external hard drives, and just swap them in and out whenever we need to archive footage, or retrieve it after it’s been archived.


“That royalty free track I used eight years ago in a TV promo will be perfect for this new web video.  Now where did I put it?”

Earlier in this blog, I likened myself to a hoarder, but that’s not 100% true.  Most hoarders have no idea what all they have.  I, on the other hand, know exactly what I’ve got archived and where it lives.  At the time of this writing, we currently have 56 hard drives in our Firstline archive.  That’s a lot of drives to have to manually pull out, attach to the docking station and search when I’m looking for a specific file or batch of footage. 

NeoFinder: 

NeoFinder
Luckily, I found this pretty cool app a few years back called NeoFinder (http://www.cdfinder.de), which acts a cataloging system for hard drives and optical discs.  Every time I archive something to a hard drive, I open NeoFinder and tell it to “catalog” the hard drive if it’s new, or “update” if I’ve previously archived files to it, and the process is almost instantaneous.  Then, when I’m looking to retrieve something from my archives, I just open NeoFinder, do a simple search and it tells me exactly which hard drive I need to pull off the shelf.

Like most things, there are multiple ways of handling backups and archiving, and what I do may not be perfect for you.  In fact, it’s not 100% perfect for me, yet.  But I’m working on it. 

The next step in my archiving plan is to make backups of each of my archive drives and store them off-site, in case of a seriously catastrophic event at our studio.  With 56 archive drives (and counting) that’s a pretty daunting task, but one I feel is vital.  Hard drives die and the time and cost associated with making these backups of backups will be well justified the first time I go to spin up an archive and it fails. 


So, how are you handling backups and archiving?

Jason Hester is a Video Editor with Firstline Creative & Media who has spliced together well over 1,000 creative video projects for television networks, Fortune 500 companies and major non-profits across the globe. Jason lives (and hoards digital data) near Atlanta with his wife and son. 

Tuesday, February 25, 2014

Through the Lens – Mid-century Meets Modern

Pairing 1950's Leica Lenses with a 21st Century Digital Video Camera
by Dan Valdes & Charlie Crose


Summaron 35mm f/3.5 circa 1957 – f3.5-f.22
What happens when you pair up classic, 1950’s vintage Leica 35 mm camera lenses with a 21st century digital video camera?  We put four lenses to the test, and discovered that kicking it old school can produce some pretty spectacular results. 

The irony of shooting moving pictures with lenses specifically designed for optimizing still photography is not lost on us. In fact, the first Leicas were actually designed to adapt the exciting new medium of the day, 35 mm cine film, for still photography.  So, we basically did a complete 360 – we took a still camera lens, which was inspired by lenses used in making moving pictures - and used it to shoot moving images on a digital video camera.

HISTORY

As a bit of history, it was 1913 when the first Leica prototypes were created and built by the visionary genius Oskar Barnack, the father of modern 35 mm photography. Barnack sought to reduce the size and weight of cameras and support equipment.  In doing so, he changed the world of photography and photojournalism forever.

His 35 mm design helped introduce the concept of exposing a small area of film to create a negative and enlarging that image in the darkroom.  Instead of exposure plates used in other cameras of the day, Barnack’s camera used the Eastman–Kodak roll film.  Due to the onset of WWI, the fist Leica cameras were not commercially produced until 1925.  The Leica became an immediate success. 

Before Barnack, photography was laborious and cumbersome, often involving a very large 8x10 view camera, tripod, bellows and shroud for the photographer.  Not exactly suited to capturing action or images on the go. That’s fine for landscapes and portraits, but imagine setting up that rig for action. By time you have the camera in place and the focus adjusted, your subject has moved on. The rangefinder allowed photographers to carry, in hand, a small, precise and highly reliable camera that could get into the action without weighing the photographer down.   

Barnack conceived the Leica as a portable camera using a small negative. By transporting the film horizontally, instead of vertically as in cine cameras, the frame size is extended to 24 x 36 mm with a 2:3 aspect ratio instead of the 18 x 24 mm frame of cinema cameras. The larger area of coverage required development of a lens specifically designed to accommodate it.  The fist leica lens was a 50 mm f/3.5 design based on a lens of the day. In order to make large photos from small negatives, it was imperative to have the highest quality optics.

1930 brought another innovation from Leica - the interchangeable lens system. In addition to the 50 mm normal lens, a 35 mm wide and 135 mm telephoto were initially available.  In the mid 1930’s, a legendary soft focus 90mm f/2.2 was introduced. Leica lenses are renown for their outstanding quality and for pushing the limits of optics. Today, the 50 mm f /0.95 Noctilux-M sets the gold standard for super high-speed photography, capturing the sharpest of images in the lowest of light levels.  Ideal for street photography and photojournalism, the superior speed afforded by Leica lenses allows the photographer to capture images that otherwise would be impossible.

With that bit of history as a backdrop, we set out to focus on putting vintage Leica lenses to the test by recording video with the micro four thirds mount and the Panasonic AF-100 as our tools.  There are many instances where these lenses are not ideal for recording video, but for certain projects and certain shots, there is simply nothing quite like shooting with Leica lenses.  Be it optical purity, contrast range, exposure range, low light performance or shallow depth of focus bokeh, Leica is in a class of its own.


THE TEST

For our test, we used the following lenses:

·         35 mm f/3.5 Summaron
·         50 mm collapsible f/2.8 Elmar
·         90 mm f/4 Elmar
·         50 mm f/1.5 Summarit – the fastest of the group 
·         We also used a 15mm aspherical Voigtlander lens – the only non- Leica of the bunch

The last 2 lenses are from the screwmount family, while the others are all bayonet mounts.  Our particular collection all date back to 1957 date of manufacture.  Our adaptors are the Dot Line series of Leica M to micro four thirds adaptors readily available at B&H.  The adaptor is streamlined and low profile which helps keep the balance of the lens closer to its native feel.  This low profile also enhances the ability of the lens to cover more of the image sensor and removal is a simple thumb release to one side and the lens comes free.  

We’ll start with Dan’s personal favorite, the 35mm Summaron f/3.5.  This lens was manufactured from 1946-1960 and is a 6 element 4 group lens.   It comes with auxiliary finder optics, a feature of no use to us working with Micro Four Thirds mounts.  For our purposes, the lens functions essentially as if working with TTL DSLR optics.  These lenses are perfectly suited to mirrorless micro four-thirds cameras like the Olympus Pen or OM-D, as the size and weight and functionality are perfectly suited to the smaller size camera body – not unlike the classic Leica rangefinder they were originally built for.  In our test, we wanted to see how they would perform using a Panasonic AF-100 and in particular, note the challenges of working in video over stills.

Here’s how we conducted our test:

·         we opened each lens to its widest aperture
·         we kept the camera in the same place
·         we used the same scenario for each shot

It was very cool to finally see how these Leica lenses would look on a video camera. For the most part, we thought they felt and looked great!  We’ve included a video with a few shots from each of these lenses so you can judge for yourself. 

ERGONOMICS

Each lens was very similar in terms of look and style with just a few little differences. Aside from the 135mm, they all looked extremely tiny on the AF-100.

Summaron 35mm f/3.5 circa 1957 – f3.5-f.22
The Summaron 35mm.   Definitely a good solid build. Not too heavy and not too light. The focus ring, located on the bottom of the lens, has a pin to control the focus ring, which moved easily and quietly. The aperture ring, located on the top of the lens, also moved easily and quietly. I did find it difficult using the pin to focus while shooting video. It’s not the most ideal way to focus a lens with video. But it’s fantastic for shooting stills with the Olympus OM-D digital camera.


Summarit 50mm f/1.5 circa 1958 f1.5-f16


The Summarit 50mm.  Very similar to the 35mm. It had the pin to use for focus, solid build, and very smooth and quiet.


Elmar 50mm


The Elmar collapsible 50mm. This lens also had a solid build. It was heavier than the Summaron 35mm but hard to notice attached to the AF-100. This lens is collapsible and also has a pin to control the focus ring. I found it difficult to find the aperture ring while looking through the camera, as it’s very small and at the tip of the lens. No problems otherwise.


Elmar 90mm f/4 – f32 Collapsable


The Elmar collapsible 90mm.  Very similar in weight to the 35mm, but more similar to the 50mm in style. However, instead of a pin to adjust the focus ring, you use the rings itself to make the adjustment. Again, this made it tricky to find the aperture ring, but everything was very smooth.


Hektor 135 mm f/4.5-f/32

The Hektor 135mm.  Charlie’s favorite when it comes to focusing for video. The ring is a nice wide band that was very smooth, and being non-collapsible, made it easier to find the aperture ring as well. It was definitely the heaviest of the bunch, but that’s understandable being the longest of the lenses.


The Voigtlander


The Voigtlander 15mm. Definitely was the smallest, lightest and had the least solid build. Its aperture ring is similar to the Leica lenses. Its focus ring felt a little smaller, but still smooth and quiet.


OVERALL LOOK

We definitely could see each lens being used to cut scenes together with very little color correction in post-production.  The color reproduction was pure and rich.

Charlie thought the 35mm overall had the noisiest image of the group, especially in the darker sections of the shot. He also thought it had the least amount of contrast. Charlie did, however, think the bokeh was nice, especially for a 35mm. The center sharpness of the image was also pleasing.

Charlie feels the Summarit circa 50mm was the most interesting (Dan calls it the most challenging) of all the lenses. This is mainly because of a haze that forms over the image when opened to its widest aperture. (Visible in the video example.) The good thing is that as you close your aperture, the haze does disappear. You can also get rid of the haze with some color correction in post-production by simply dropping the level of your blacks.  It’s something that could possibly be cleaned by a professional camera shop but ours hasn’t yet been refurbished.

The Elmar collapsible 50mm was the second favorite of the group. It had a very nice film look to it. Charlie thought the sharpness of the image was nice, but not as sharp as he’d like. The contrast was nice and the bokeh was good.

The 90mm lens was our favorite by far. The contrast and overall sharpness was great!  The bokeh is very pleasing to the eye and just kind of fades away - not distracting at all.  The image is clean with no noise.

The 135mm has by far the best bokeh, even at an f/4.5.  Charlie wanted it to be a little sharper than it was along the lines of the 90mm, but it didn’t quite get there. The contrast was still good and it was a very clean image with no noise. 

The Voigtlander was an amazing 15mm lens.  We hardly noticed any distortion. The sharpness was great throughout the entire image.  Overall, it was a very clean image with not much noise at all; well, maybe just a little in the darker parts of the image. It also matched really nicely with the Leica lenses in the colors and contrast.

The hardest part was probably adjusting to the focus and aperture rings since they are flipped on these lenses. Otherwise, they fit perfectly and didn’t require any change in the camera to start shooting.  In the future, we’d love to try out the R series or S series for video as opposed to these smaller M series because they are bigger and more ergonomically balanced with a larger video camera.  They would also mate more easily with follow focus and matte box accessories.

Ultimately, we feel like the Leica M series would not be the best lenses to use for run-and-gun type b-roll shoots or, for that matter, any shoot that requires a lot of movement and adjusting focus. The lenses were just too small.  We do agree that they’d be great to use for sit-down interviews and shoots alike.  

We’ve been excited to try out these lenses for the longest time and it was a lot of fun finally being able to do it.  In the final analysis, we’re confident that we can use the M series lenses to shoot some beautiful video, and in the process, capture that unique Leica look.   

Dan Valdes is Director of Production with Firstline Creative & Media, LLC.
Charlie Crose is a videographer and editor also with Firstline Creative & Media, LLC. Mr. Valdes and Mr. Crose have both privileged to see their video and photographic work featured on a variety of national and local broadcast and cable outlets as well a on websites and numerous print publications. 


Monday, February 17, 2014

Perfect Pitch - How to Score Earned Media Interviews

A former CNN Anchor describes how to capture an assignment desk's attention

Any good pro baseball pitcher will tell you that you need more than one weapon in your arsenal – a knuckle ball, a curve ball, a fast ball – you get the idea. The same goes for pitching the media.  A few new, exciting and different pitches get better results than just throwing out the same thing time after time. 

The same old pitch that worked great last year won’t fly this year, because stations are always looking for something new. To help you get to first base, here are a few things to consider for that perfect pitch.

Hot or Not? 
Is this brand new, never-heard-before information that’s hot off the presses? If so, the media will LOVE you. But try to re-package a 6-month old study and call it “new” and you’ll get nothing but crickets. In the world of news, something that happened yesterday is already getting old, and if it happened last week, it’s downright ancient.  So make sure your story is timely.

Old or New?
Living with diabetes is a story that appears year after year, and the media will pass if you pitch them the exact same story, one year later.  But what if you have a brand spanking new approach?  Let’s say you have an expert who can discuss the coolest new apps that put a high-tech spin on disease management, or awesome new technology that will revolutionize blood glucose monitoring or insulin delivery? Now that’s a new angle, and a bookable story!

News or Commercial?
There are commercials, and there is news. Know the difference. Outlets are always interested in an interview with genuine news value. But if your expert mentions your product or the sponsor in every answer, that, my friends, has crossed the line into the land of the commercial. Stations won’t give their precious air time away for free to promote your product --that’s why they sell commercials. If you are lucky enough to get the media to cover your story, once they realize you’re trying to get a free commercial, they will either cut the interview short, choose not to run it at all, or else edit out all commercial references and run your story without your talking points.  In each case, you get zero ROI. Even worse, you’ve seriously damaged your credibility, and along with it, your chances of booking future interviews with that same outlet.

So remember, a pitch is more than tossing out just anything and expecting the media to bite. It’s what you put into that pitch that makes the difference between striking out or hitting a home run.

Anna Hovind is an Executive Producer with Firstline Creative & Media in Atlanta, Georgia. Prior to Firstline, Anna worked as an anchor at CNN, appearing on Headline News, CNN International, CNN Airport Network and CNN Radio. She can be found on LinkedIn.

Wednesday, February 5, 2014

Roar the Mouse

How a small non-profit used online video and modest social media marketing to drive global awareness and donation dollars
by Sean O'Grady

The Mission
Watch the Documentary: http://bit.ly/1iAQyvl
Archangel Airborne is a Pennsylvania based non-profit organization dedicated to providing free, sustainable medical assistance to devastated regions.The group is comprised of a team of approximately 40 aviators and medical professionals who donate their personal time and money to plan and conduct medical clinics in remote areas.

Archangel's founder, Stu Hirsch, created the group in January 2010 immediately following the devastating magnitude 7.0 Haitian earthquake - a disaster that killed over 250,000 and displaced over 1 million people to tent cities.

Since then, Stu and the Archangel Airborne team have flown eight aid missions to Haiti and provided free medical care to over 6,000 impoverished residents.

Archangel has done well, but like many small non-profits, it has racked up expenses.

Stu and the group have admirable ambitions to grow Archangel Airborne beyond Haiti's borders. In fact, they're already making progress, having provided medical supply runs to the Jersey Shore following Superstorm Sandy, and performing feasibility studies for potential medical clinics in Nicaragua.

But in order to grow, they'll need dollars. And to get dollars, they'll need awareness.

Tell Me a Story:
An old high school acquaintance introduced me to Stu and Archangel Airborne in the fall of 2011. As I listened to Stu's initial organization pitch, I heard the voice of legendary CBS News Producer Don Hewitt whisper through the back of my mind, "Tell Me a Story." I was hooked. Less than an hour later we had hatched a plan:

- Let's embed a video crew with the Archangel team on the next Haiti mission
- We'll create a series of short videos and a brief documentary film about the experience
- And we'll release this material to local media on the Earthquake's anniversary

It was storytelling 101, and here's how it played out.

Start Slow, Invest Low, Watch it Grow:
In May of 2012, I donated the airfare to send two one-man-band videojournalists with Archangel Airborne to Haiti. They recorded approximately 18 hours of interviews and footage. We knew we wanted to create a long-form documentary, but we first used the footage to create digestible, viral nuggets - little videos that could be easily be shared and consumed by local media.

We edited and uploaded a handful of short videos for YouTube and a downloadable b-roll reel to share with local news outlets. We combined these hyperlinks with some copy to create a clickable press release and fired it off to approximately 20 media contacts in the Scranton, Pennsylvania, media market a few days before the earthquake's anniversary.

It paid off.


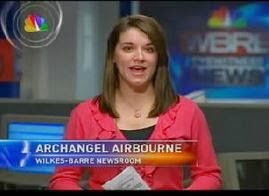
The humble group of aviators and medical professionals found themselves featured in:

- The Scranton Tribune
- WBRE NBC in Scranton
- YNN throughout New York State

SEO and traffic to ArchangelAirborne.org soared. They had arrived, and were now ready for stage two of our plan.

Double Down:
Year one of the campaign was about media awareness. Year two was about media & social media awareness. Both were driven simultaneously using the following steps:

- Our team created the thirty minute documentary film Flight of the Archangels
- We organized a film debut party for the weekend of the earthquake's anniversary
-  We uploaded the documentary to YouTube and sent a clickable press release to local media
- Archangel team members and local media were invited to the debut
- An email and social media blast was coordinated to follow the documentary screening

We kept it simple. We kept it manageable. And to date, we're keeping the traction going...

Moving the Needle: 
The documentary launch party occurred at Archangel Airborne's hanger headquarters in Honesdale, Pennsylvania, on January 11, 2014. The Scranton Tribune and Blue Ridge Cable covered the event. A few dollars were spent on light refreshments and Stu allocated $50.00 to promote the documentary post on Facebook. Within one week the following had happened:

- The Flight of the Archangels documentary gained over 500 views, 12 likes and 5 comments
- The documentary garnered 10,020 impressions on Facebook
- Bitly reported 1,140 clickthroughs
- Archangel Airborne's Facebook fans grew from 825 to 1,072
- Nearly $1,000 were donated
- 10 individuals contacted the Archangel website and Facebook page asking how they could donate

And the word keeps spreading.

Stu and his team are now using the 30-minute film to promote Archangel Airborne to universities, medical charities and numerous other civic and philanthropic institutions. The film will be used to help Archangel Airborne apply for fundraising grants and it will also be entered into a series of film festivals this summer throughout Pennsylvania, New York and New Jersey.

Not bad for $50.00 and a week's worth of on-location taping.

Flight of the Archangels may not win an Oscar, but it could help save a life in Haiti, and that's a story worth spreading.

To donate or learn more about Archangel Airborne click here


Tuesday, January 21, 2014

Dog Gone Wild in TV Land

Preparing for the Wild World of Animals on Live TV 

Chihuahua Blowing Kiss LIVE
In the world of TV news, it’s pretty common knowledge that the two most challenging groups to work with on camera are kids and animals because they can be a little, let’s say, unpredictable. So when I recently traveled to New York to work on a satellite media tour with the ASPCA, I was more than a little bit nervous about what was in store because we were going to have a dog in the studio. 

The Checklist: 
Our team collectively tried to anticipate every possible scenario of how to keep our canine guest contented, bending over backwards to anticipate the dog’s every need. Food and water? Check. Doggie treats? Check. Piddle pads? Check and double check. In short, we did everything humanly possible to set the stage for an unpredictable and potentially skittish pooch.

Deep Breaths: 
On the morning of the tour as we waited for our canine star to arrive, everyone was filled with anticipation and more than a little bit of trepidation. Would this pooch be too frisky for live TV?  Would there be a doggie “accident?”  Or two?  Would the pup be camera-friendly, or beastly?

Our questions were answered when a petite, perky pooch arrived ready for her SMT close-up.  Her name was Mara -- an adorable, tawny Chihuahua mix whose tongue was just a teensy bit too big for her mouth. At rest, it protruded between her teeth, making her look like she was blowing “raspberries.”  Mara arrived with her very own handler, a seasoned ASPCA volunteer whose job was to take the dog on walks during long breaks between interviews, and to be sure the little pooch had ample access to food and drink.

Our canine cutie’s mission during the SMT was to serve as a living testament to the awesome animals available for adoption at local shelters, and to encourage the viewing public to make adoption their first option. And boy, did she do her job!  She performed like a real pro during the interviews: no stage fright, yipping, nipping or answering the call of nature in the studio.  Well… there was ONE time that she tossed her kibbles immediately after an interview ended.  Thankfully, that graphic scene literally wound up on the studio floor, instead of live TV.  

The Unexpected Happens: 
For those of us behind the scenes, the biggest relief was that instead of having a furry drama queen in the studio, Mara was really mellow. That was a blessing considering she would be on camera for a series of interviews that began at 7 am and continued until 1 pm, with several “bio breaks” in between.  As the morning wore on, Mara actually got a little too relaxed on camera.  

Snoozing on LIVE TV
At one point, she fell asleep during an interview, with that little pink tongue sticking way out of her mouth and a paw thrust carelessly into the arms of the spokeswoman. For all intents and purposes, it looked like she had passed on to that great dog park in the sky.

Those of us watching the TV monitor in the green room erupted in peals of laughter, and when the interview ended, our normally calm, cool and collected producer burst from the studio doubled over in hysterics. The rest of the in-studio support team emerged, with tears streaming down their cheeks from stifling their guffaws during the interview. Like I said, kids and animals are always unpredictable.

Sleeping Beauty Adopted: 
The best news of the day, though, is that Mara touched so many hearts in TV land. By the end of the tour, two of the people in our control room were ready to adopt her, and she also had multiple offers from the crew members and producers at several stations that took part in our tour.

So, mission accomplished, Mara!  Here’s hoping that you’ve found your forever home, and that you’ve helped many others just like you find the happiness they deserve.

Anna Hovind is an Executive Producer with Firstline Creative & Media in Atlanta, Georgia. Prior to Firstline, Anna worked as an anchor at CNN, appearing on Headline News, CNN International, CNN Airport Network and CNN Radio. She can be found on LinkedIn.

Monday, December 23, 2013

PR Lessons from Ron Burgundy

A former CNN Anchor extracts PR tips from the faux-newsman’s classy quips
by Anna Hovind

I’ll be the first to admit that I’ve got a soft spot for cheesy anchorman Ron Burgundy.  In fact, just about everyone I know who’s a current or former TV news broadcaster feels a special kinship with the mustachioed anchorman. I think we’ve all worked with someone like Ron Burgundy somewhere in our careers.
Besides the intense ego and obvious lack of intellect that make Ron such a foil for the TV news industry as a whole, there’s something that all of us in the PR and broadcast PR business can learn from Ron. 
“I immediately regret this decision.” — Ron Burgundy
There’s a big difference between what is “news” in the eyes of the media versus the perception of “news” as seen through the eyes of a PR person who’s never set foot in a newsroom.  And just like Ron Burgundy’s co-anchor Veronica Corningstone, those of us who’ve worked in the rough-and-tumble newsroom environment can spot a fake a mile away. You can’t just expect the media to eagerly grab your pitch and run with an overly commercial, self-serving message merely because you and your client think it’s newsworthy. Or, let’s say you successfully pitched the story, but after the outlet has done the interview, they realize it’s just a sponsored segment masquerading as a news story. They are under no obligation to run the story just because they conducted the interview, and chances are you’ve just wasted both your time and that of the media. Back in my newsroom days, I used to have a “three times and you’re out” rule.  If someone pitched me three stories in a row that were commercials pretending to be news, I would never take a call from that person again.
"I look good. I mean, really good. Hey, everyone! Come and see how good I look!" – Ron Burgundy
 
A great interview is much more than an attractive spokesperson or a celebrity who’s hawking a series of attractively displayed products. People can see through a thinly-veiled commercial quicker than you can say “Stay classy, San Diego.” So the best way for you to stay classy, is to give your news outlet something substantive, some meat along with your client’s “key message” potatoes.  At the end of the day, a great TV interview is one that provides timely, meaningful, useful or interesting information.  The interviewee provides expertise, wisdom, and hopefully leaves the audience with news they can use. The minute your talent begins talking exclusively about brand-name products and only the sponsor’s brand-name products, your credibility goes out the window.
 
“You know I don’t speak Spanish.” — Ron Burgundy
One of the biggest mistakes we see in TV and radio land is when a spokesperson (aka, the “talent”) has been overly media-trained, often to the point where a question that deviates even slightly from the memorized key messages can literally render the talent speechless. That tongue-tied response happens because many media trainers erroneously teach the talent to either 1) immediately hijack the interview and never let the anchor get a word in edgewise; 2) make certain to mention their sponsor or product right out of the gate; and 3) continue to mention the product or sponsor in the response to every single question. Yikes! In the language of news, this is the best way to sound like a commercial and prevent your story from being aired.  
 
"I don’t know if you heard me counting. I did over a thousand.” — Ron Burgundy
 
If you really want to be a valuable news source to the media, the trick is to share content that has solid news value.  End of story. That type of PR person is worth his or her weight in gold to the media.  If you can become a reliable source, if you are the person with a great story angle and can pitch an awesome, seasoned spokesperson who is capable of delivering quotable quotes or tasty sound bites, you’ll find that reporters will do more than take your calls: sometimes, they’ll be the ones calling you.


Anna Hovind is an Executive Producer with Firstline Creative & Media in Atlanta, Georgia. Prior to Firstline, Anna worked as an anchor at CNN, appearing on Headline News, CNN International, CNN Airport Network and CNN Radio.  Anna started her broadcast career in the newsrooms of the late 1970’s, where she worked with more than one Ron Burgundy wanna be. Anna can be found on LinkedIn.

Tuesday, November 12, 2013

Going Deep with ND Filters

How Camera ND Filters Can Create Depth of Field in Tight Spaces
by Charlie Crose

Click upon the video below to see a live example
Recently, I was on a video shoot and the client asked if we could shoot interviews inside a doctor’s office. Sounds easy, right? Not always. Situations like these can really have an effect on the look you are trying to achieve, and in this case, the desired look required was depth of field. Ordinarily, that’s no big deal. However, what made this difficult was the size of the office.

Knowing your equipment will help when you are put into a situation like this. The trick that I like to use is the built-in ND filters on the video camera.

On this shoot, I was using a Panasonic AF-100 video camera, which has three built-in ND filters.

-          ND4 = Reduced light by 2/STOPS
-          ND16 = Reduced light by 4/STOPS
-          ND64 = Reduced light by 6/STOPS

With the limited space available, I couldn’t get the right distance from the subject or use a lens with a longer focal length. So my only option was to grab a wider lens with the highest f/stop possible and choose an ND filter.  

By using the second ND filter and opening up the lens to its widest aperture, which in this case was f/1.8, I was able to achieve the desired depth of field and get the professional look that we were striving for.

I’ve been in plenty of similar situations where this little trick has come in handy. Below is a screen grab of one of those situations. The talent we were shooting needed to be placed in front of a wall with barely any space behind him.

 Here’s the depth of field I was able to achieve by simply using the built-in ND4 filter.


Here’s another example that shows how effective this trick can be in creating depth in your shot.


So the next time you’re in a small space, or even if you’re just looking to get better depth of field, look to ND filters and you’ll be just fine.
 
Charlie Crose is a videographer and editor with Firstline Creative & Media, LLC. Mr. Crose's work has been featured across a variety of national cable networks and local broadcast affiliates.